Turn off your system: Always shut off the HVAC unit before removing the existing filter for safety.
Remove the current filter: Slide it out carefully and look for the size printed on the frame. This is the nominal size.
Measure the actual dimensions: Using a tape measure, record the length, width, and depth (thickness) of the filter. Measure to the nearest 1/8 inch for accuracy.
Check your filter housing or unit specs: Look inside the filter track or unit manual for required dimensions. Some systems are designed for very specific actual sizes.
Compare nominal vs. actual size: Understand that the labeled size (e.g., 20×25×4) is rounded. The actual size will be slightly smaller. That exact fit is what matters for your system.
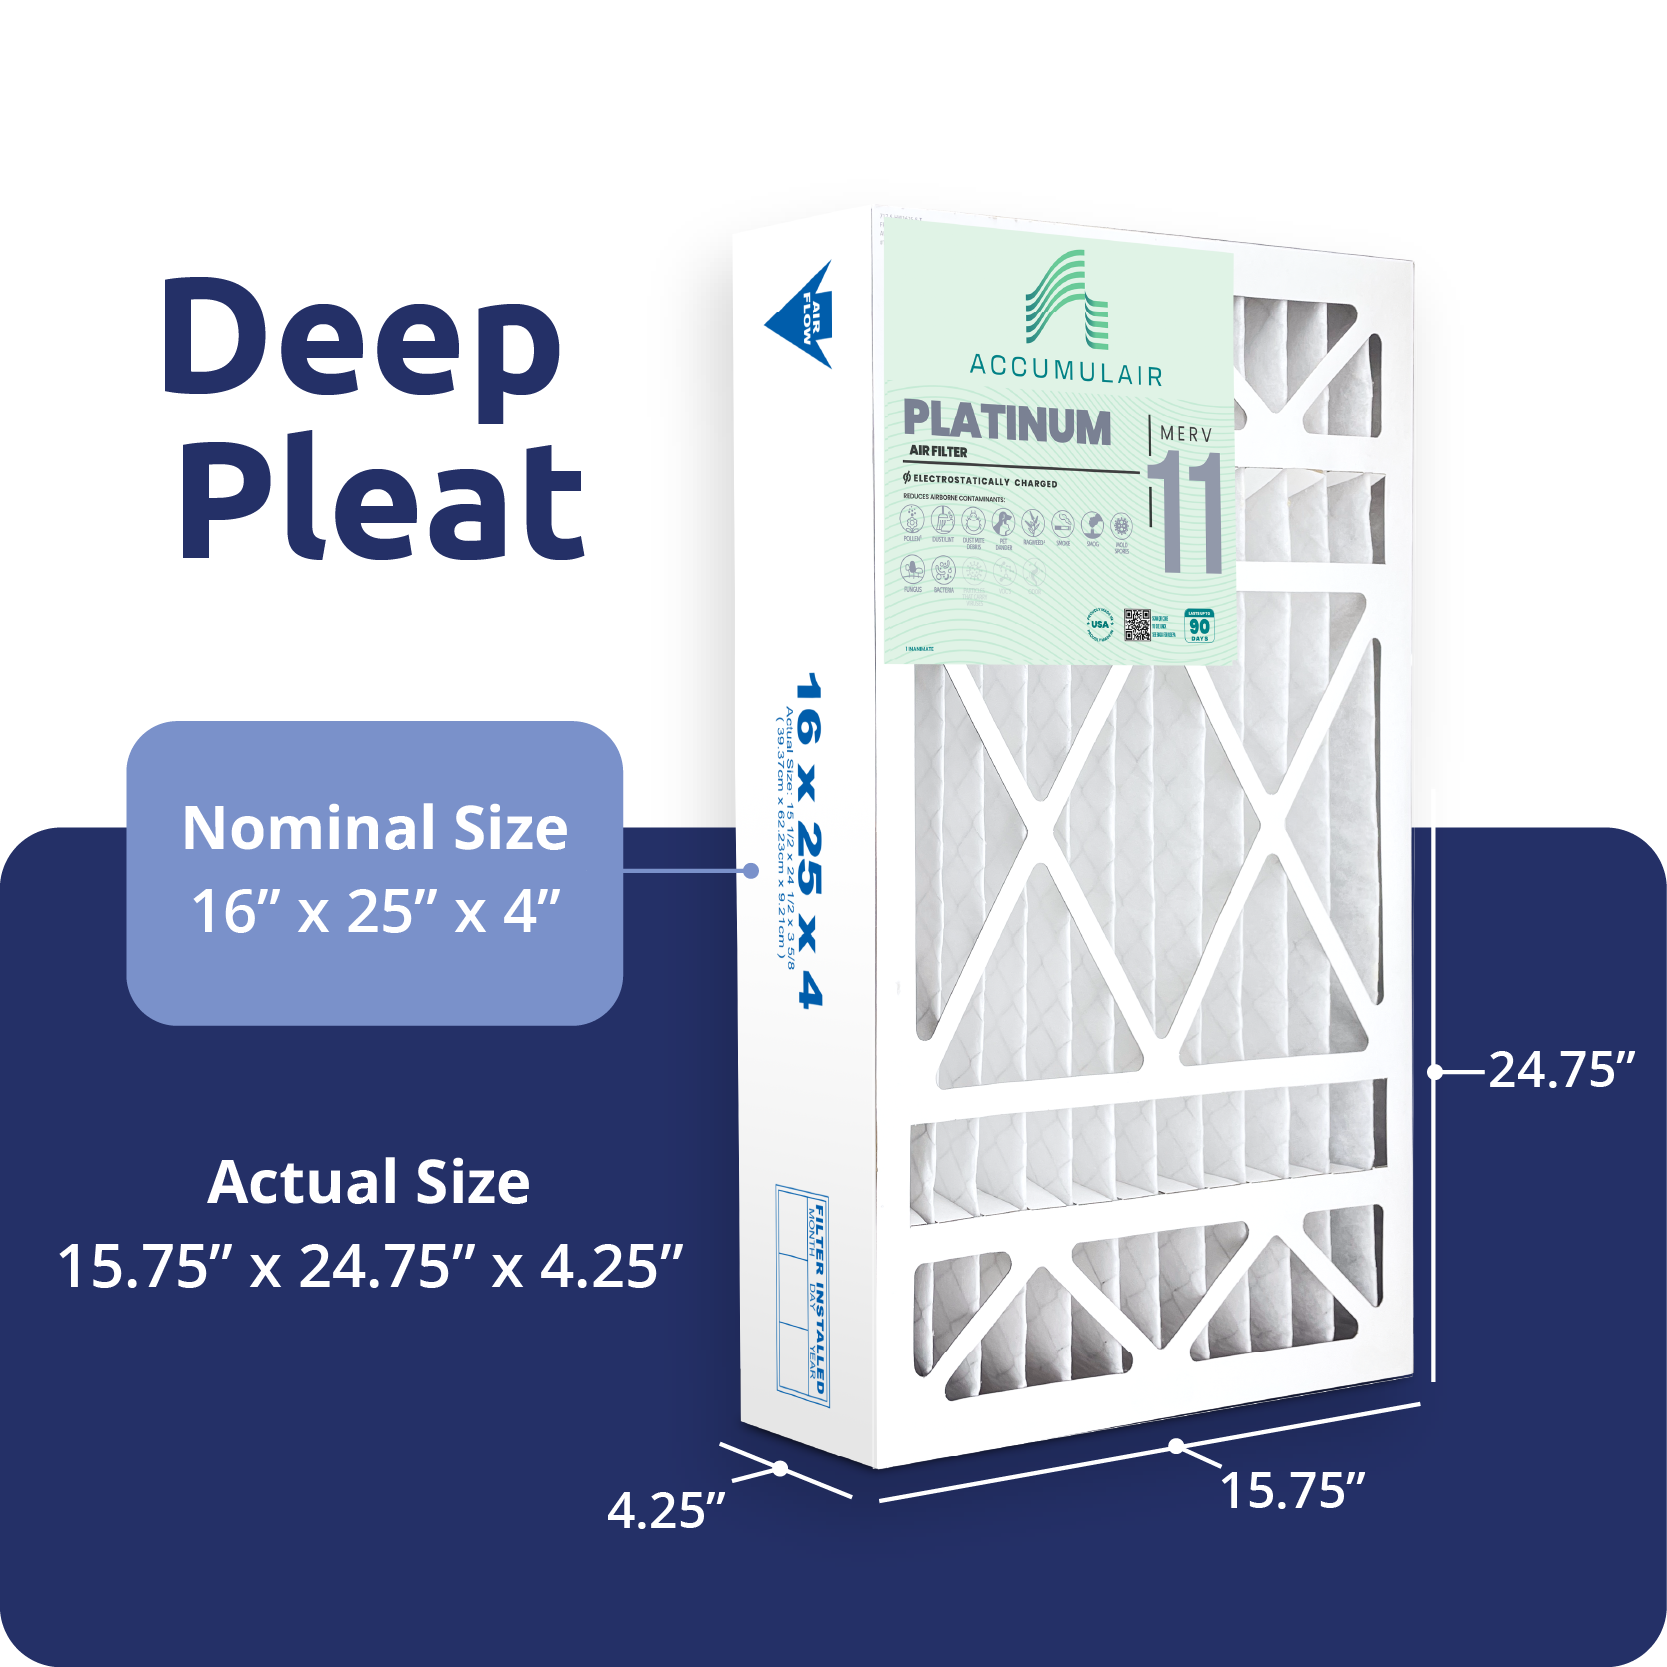
Example:
The filter below is labeled 16x25x4. This is its nominal size, but its actual size is closer to 15.75×24.75×4.25, which can vary slightly by manufacturer and affect proper fit.
How To Install A Deep Pleat Filter For Your System
Select the appropriate MERV rating: Higher MERV ratings capture smaller particles, but not all systems can handle the added airflow resistance. Choose a rating that balances air quality needs with your system’s capabilities.
Check airflow direction and installation requirements: Deep pleat filters have a designated airflow direction (usually marked with arrows). Installing it incorrectly reduces performance and can strain your system.
Avoid lookalike replacements: Some filters may physically fit your system but aren’t designed for deep pleat performance (e.g., lower-capacity pleated filters). Using these can reduce efficiency and shorten service life.
Set a replacement schedule: Deep pleat filters last longer than standard filters (often 6–12 months), but timing depends on usage and environment. Check periodically and replace when visibly loaded or per manufacturer guidance.